Sunday, April 19, 2015

cardboard crush class (lots of pics!)

As I've mentioned before, I like Roben Marie's style. Her colors, doodles, projects, etc, all appeal to me, so I didn't have to ponder too longer before signing up for her Cardboard Crush class. To watch the promo vid and/or sign up for the class, go to Art to the 5th. The workshops are listed down the right side.

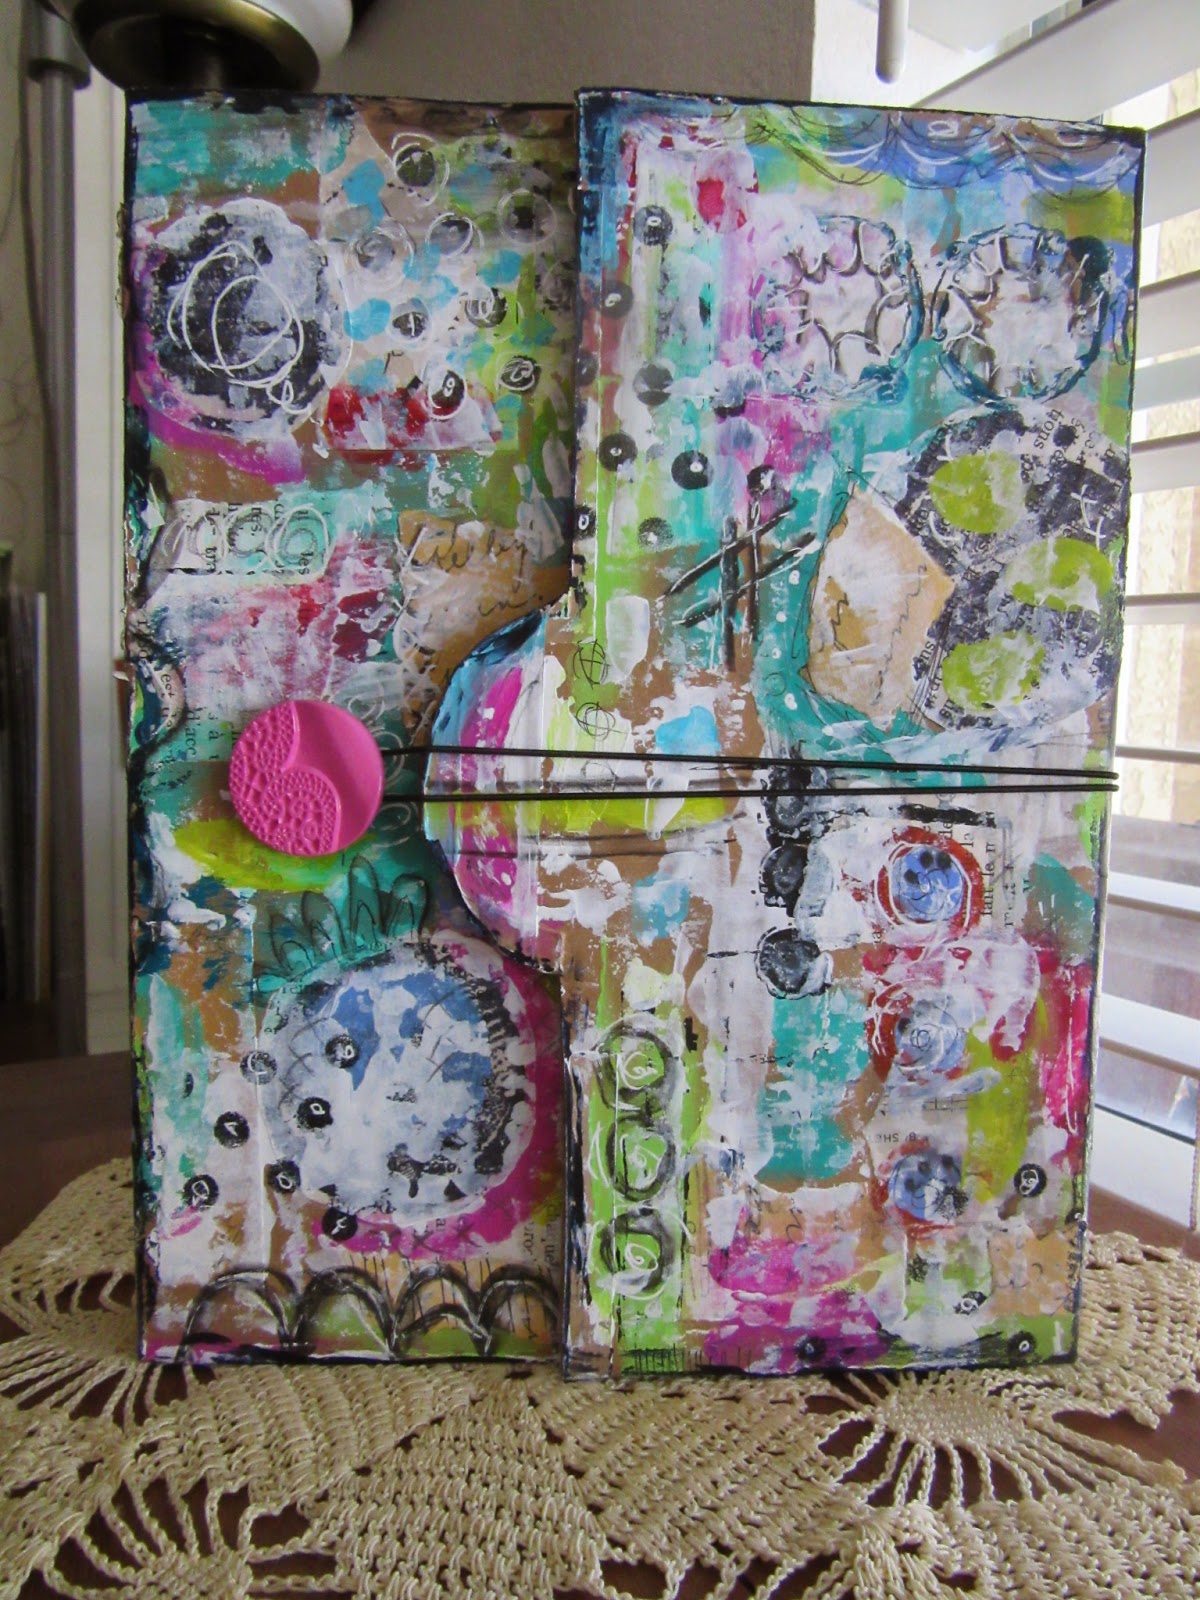
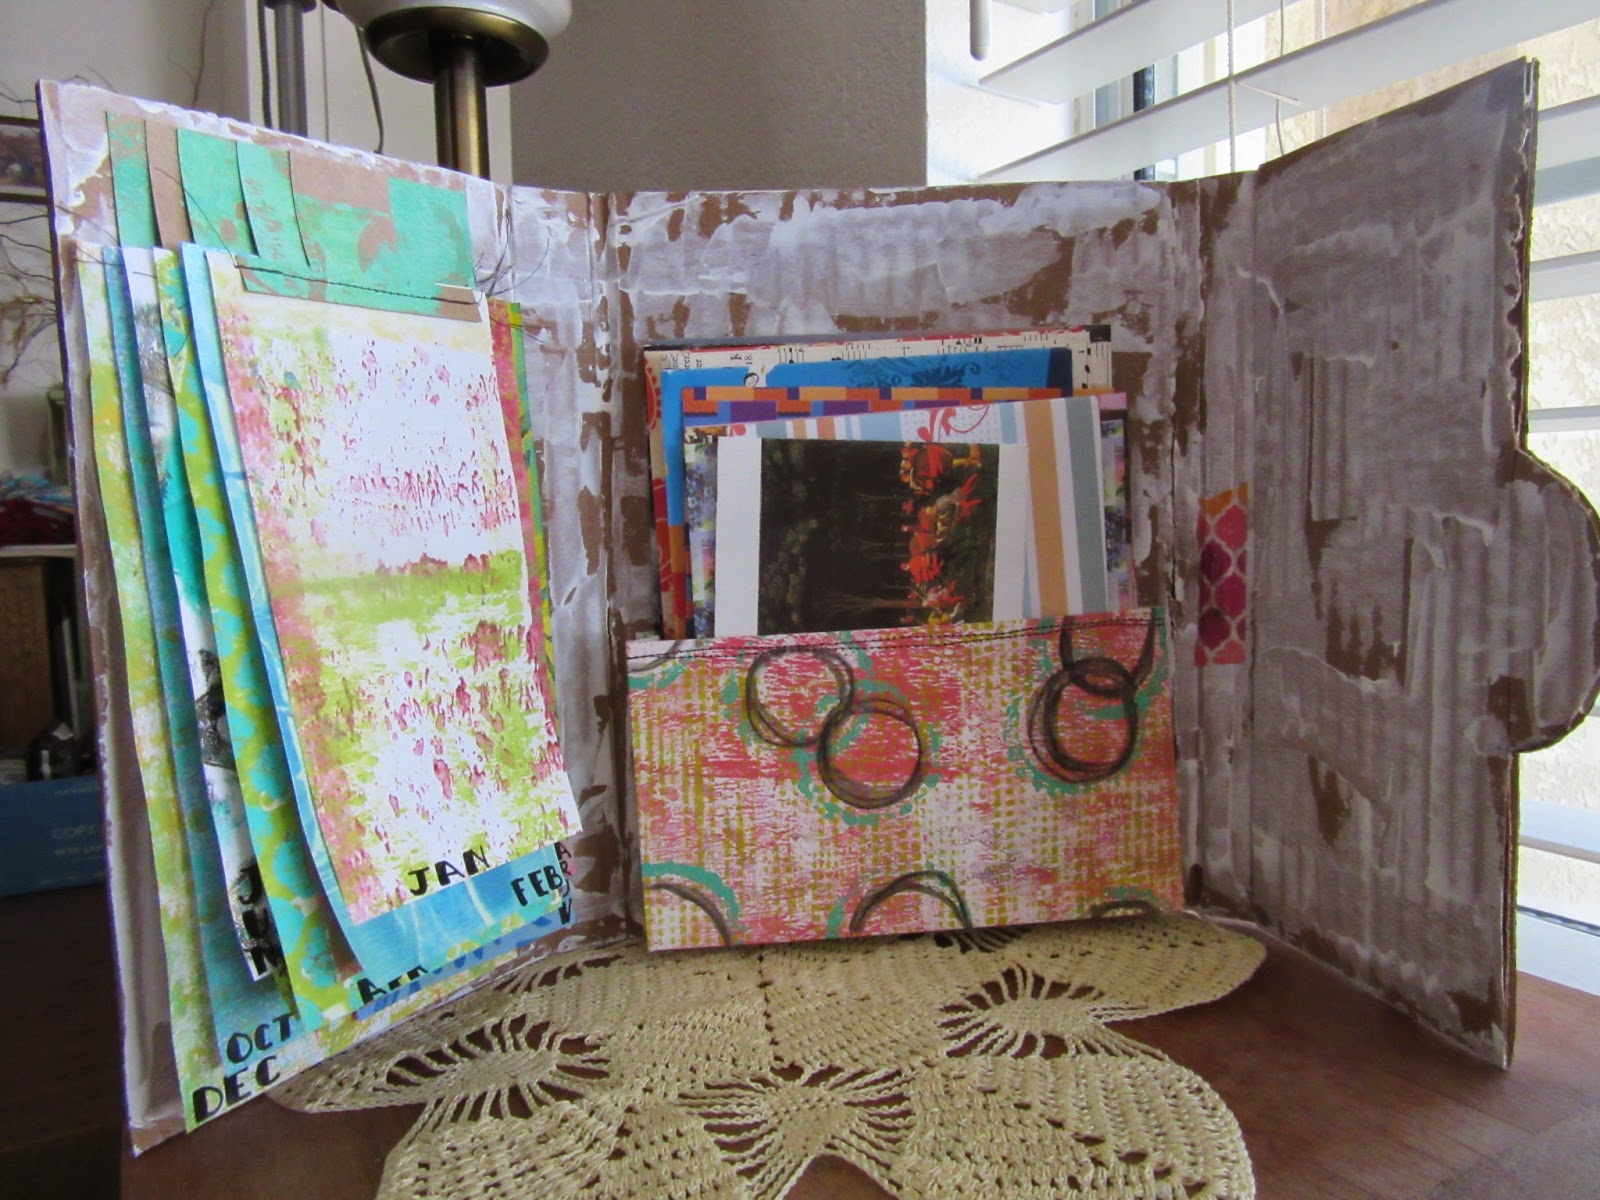
Each instructor makes their own version of this booklet/folder thing. Of course I did Roben Marie's version first. The substrate is just a chunk of corrugated cardboard box. The first 6 pics are process photos, taken as I was making the cover. The rest of the pics have details beneath. I'm using it as a birthday card holder, with little flaps of paper, one for each month, with birthdays written on the back of the appropriate month to remind me, and a pocket to hold cards.


The finished folder. I used an old shank button attached
on the inside thru a smaller button so it won't tear thru
the cardboard with use.

The back.

Partially open, showing the pocket to hold cards.

The inside, with a paper flap for each month with birthdays
written on the back, and a pocket to hold cards.

A better look at the month flaps.

Bottom corner of my pocket. I wanted it to have more depth
than the one in the instructions so winged it by folded up a piece
of gelli printed card stock. Works great.

Wa-la!


dlp2015 weeks 11 & 12

I see that March 13 was my last post. I do so much on Instagram now - which also loads to Facebook, Twitter, Tumblr (which I don't even know how to log into anymore but still collecting followers lol), and Flickr - that coming over here to write about it feels like a bit of an afterthought. But I'm not ready to quit blogging yet, so I'll do some catching up.

I'm still on track with doing the pages each week, just behind in blogging about them. I love that DLP2015 is completely free and has a lot of fun vids. While they are not step by step tutorials, it's always neat to watch someone else use the same supplies you have sitting around, and I often come away with something new to try or a reminder of a technique I'd forgotten about. So, thanks! Roben Marie and Art to the 5th ladies!!

There are sorts of interpretations of "borders" but, as usual,
I chose the most literal and made borders around my page.
I think I had visions of quilt-type borders, but alas,
I ended up with this, my least fave page so far. gack

On to "focus". I wanted a main element on the page that would
be the focal point. Doodling doesn't come naturally to me
but I worked at it and wound up with this. Like the colors
and I guess I like the page well enough. 

Friday, March 13, 2015

tastes great

Just a postcard, done in the 3 elements style of some previous ones, but with doodles this time. The black splat is a bingo marker banged down hard. Gelli print background.

Tuesday, March 10, 2015

dlp2015 week 10

Ten weeks in and I'm still on track. Since it's about the only art I'm doing, I guess I shouldn't be real surprised.

This week is about making marks. My favorite 'mark' is a circle, so I cut a ton of circles (ended up using 97) from a wide assortment of gelli prints, then layered them all over the page. Added some black paint circles with a toilet paper tube and a bottle lid, then small white gel pen dots in 3's here and there and called it done.


Friday, March 6, 2015

blooming fruit trees

Spring has at least partially sprung here in my part of N California. My fruit trees are in various stages of bloom, including the totally non-producing-two-years-a-row plum tree. So glad we planted a few fruit trees when we moved in here. I've never had fruit trees before and it's so cool to walk out in the morning and pick a sun-warm nectarine to cut up on my cereal.
Not shown, the peach tree. It's in bloom but I couldn't get a decent angle on a single flower without getting in my own light, etc.

Baby apricot, about an inch long.
Looks like it's gonna be another record year for apricots.
Sure wish my nectarine produced like this.

Nectarine blossom, a lovely pink. This tree is just gorgeous
right now. Hope it goes crazy with fruit.

Plum blossom. This silly tree didn't do *anything* the first year.
No blossoms, no fruit. Second year it had a few blossoms but
no fruit. This year - ba-boom! Lots of blossoms which hopefully
translates into lots of plums!

Just a cluster of plum blossoms cause I'm so impressed with
this tree this year.

Monday, March 2, 2015

dlp2015 week 9

Ok, after last week's debacle, I paid attn and pulled off week 9 without a hitch. I followed right on Roben-Marie's heels on this one, doing pretty much each step she did but in my own style. Whatever the hell that it.

1. Background - Glued down a piece of painty under paper, the lightweight brown paper I cover my work table with.

2. Paper Stack - Made a stack of painted and gellied papers of all sorts. This was my favorite part of the exercise, picking thru my paper box, tearing them into the right sized pieces, stacking and restacking until I liked the arrangement. Made a large one, a small one, and 3 circles. I'll be doing more of these. Sewed it right onto my page so that when I turned it over to journal, I had stitching all over the place and had to write around it. Doh.

3. Painty - Rubbed some heavy bodied white paint here and there to sort of blend in some of the paper edges and scruff up the border. Then some marks with the Stabilo All pencil, maybe my fave art tool next to my gelli plate. Wet the marks with a brush so they dribbled all over. #ilovegrunge

4. Stamping - Stamped black circles here and there with various things - empty tape centers (double rings at bottom left), empty adding machine paper centers (small circles on yellow at upper left), and a cardboard tube of unknown origin.

5. Gel Pens - Lots of mark making with black and white gel pens.

um... 5B. - A few words of text from an old book.

Friday, February 27, 2015

dlp2015 weeks 6, 7 & 8

Oy. When the week 7 prompt came along, cover up the good parts, or something like that, I made a background and sat it aside to dry. When I came back to my desk, I mistakenly picked up week 6 and covered it all up with dress pattern tissue and used tea bags.

Then I saw my real week 7 sitting where I had placed it to dry. Whoops.

So, ok... I just covered up week 6 which I really liked. But that was the whole idea, right? Sorta.

Anyway, I did a bit more stuff on the real week 7, adding more black than I normally would, then ran out of steam cause I was bummed about messing up. But I do like the look of all the tissue and tea bags on week 6.


Week 8 was about repeating and I used squares instead of my default circles, just for something different. The black ovals are a stencil I cut from an old file folder. Spelled out SQUARES across the page and did a bunch of black and white doodling.

Altogether a weird dlp2015 week. Will try to pay more attn for the week 9 prompt which comes out tomorrow.